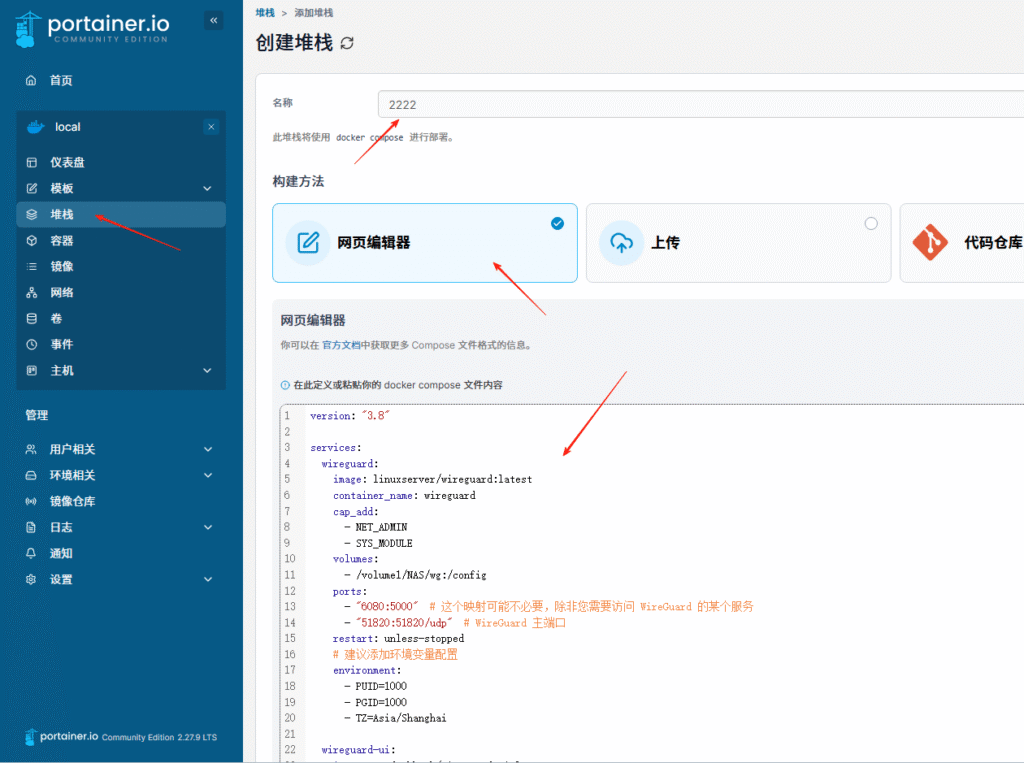
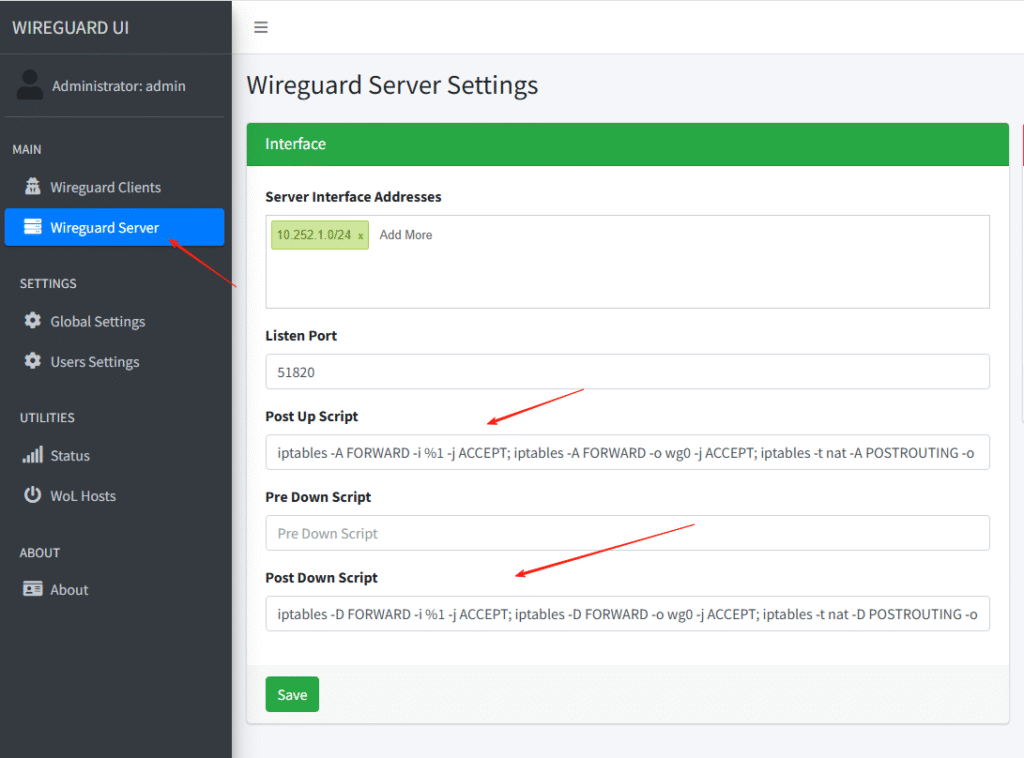
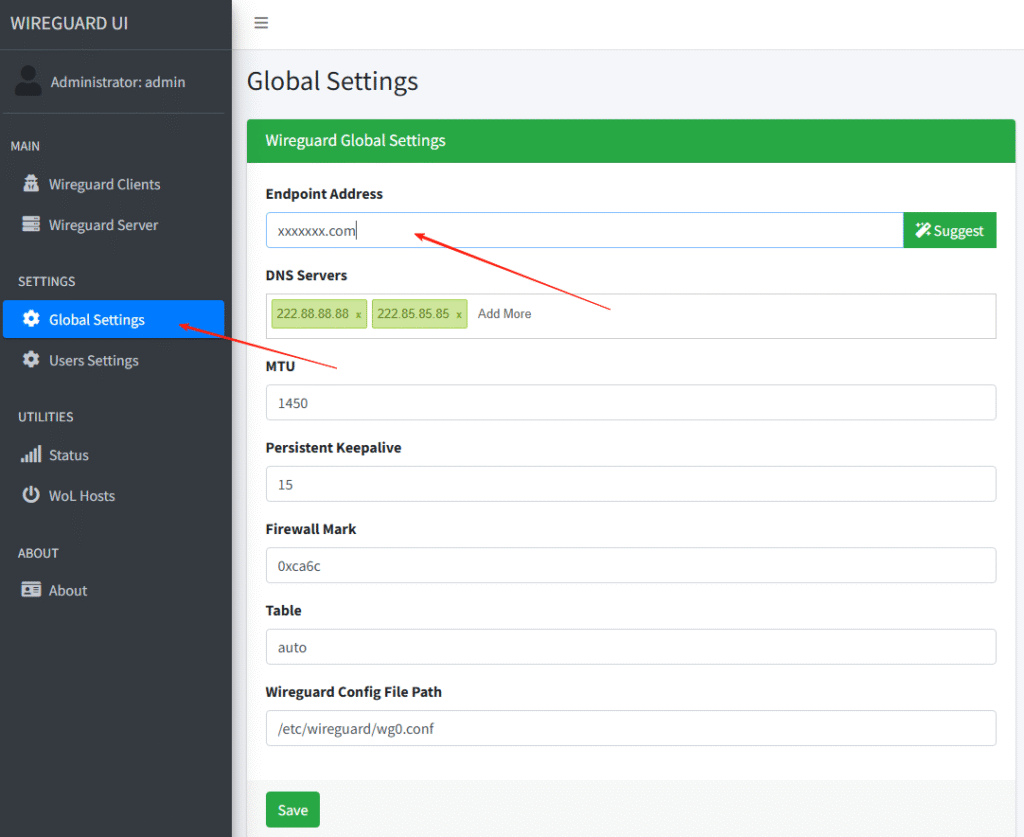
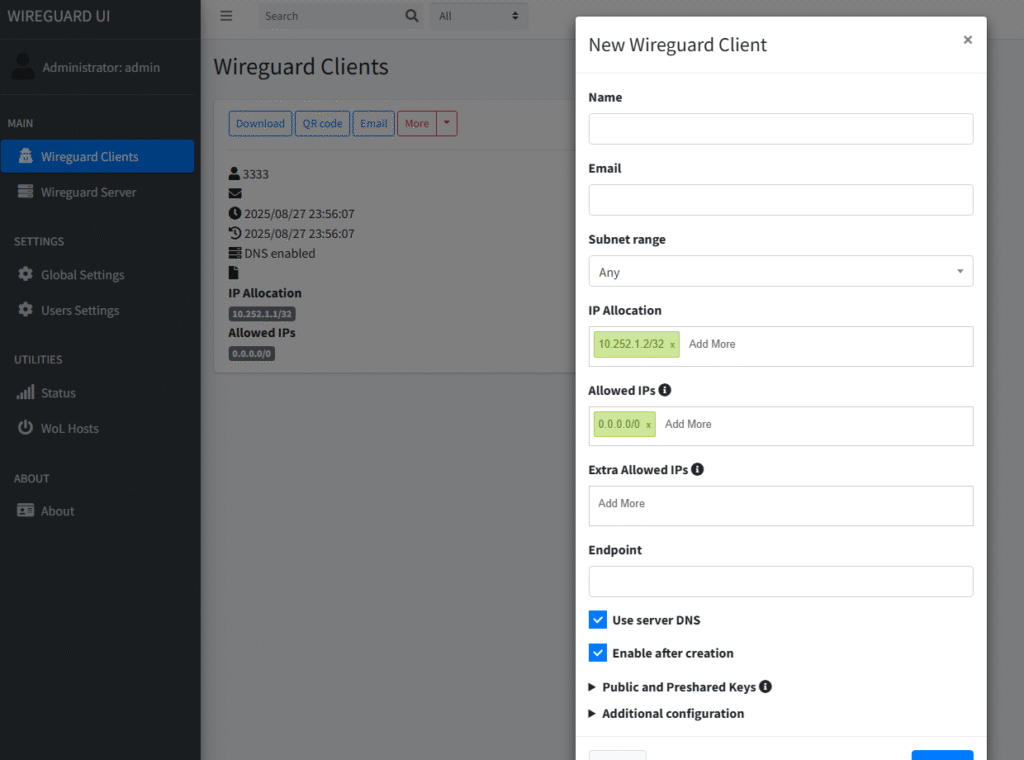
找了一圈方案,终于寻到一个住宅IP方案可以手机FTP的
2025 Kindle 越狱教程:不限 Kindle 型号,不限固件版本
教程转载自:https://bookfere.com/post/1145.html
根据教程将我的KPW5成功越狱+安装koreader
越狱期间踩到的坑:
- 1、教程里的商店不出现越狱文件的问题
- 2、安装KUAL图书馆不出现的问题。
解决办法:
通过Cloudflare Worker实现Free.fr免费空间自定义域
教程来自:https://blog.552211.eu.org/post/66
一、首先:进入Dash CF面板新建个workers
二、部署后编辑代码
// Website you intended to retrieve for users.
//const upstream = 'www.google.com'
const upstream = 'yourid.free.fr'
// Custom pathname for the upstream website.
const upstream_path = '/'
// Website you intended to retrieve for users using mobile devices.
//const upstream_mobile = 'www.google.com'
const upstream_mobile = 'yourid.free.fr'
// Countries and regions where you wish to suspend your service.
const blocked_region = []
// IP addresses which you wish to block from using your service.
const blocked_ip_address = ['0.0.0.0', '127.0.0.1']
// Whether to use HTTPS protocol for upstream address.
const https = false
// Whether to disable cache.
const disable_cache = false
// Replace texts.
// const replace_dict = {
// '$upstream': '$custom_domain',
// '//google.com': ''
// }
const replace_dict = {
'$upstream': '$custom_domain',
}
let data={}
addEventListener('fetch', event => {
event.respondWith(fetchAndApply(event.request));
})
async function fetchAndApply(request) {
const region = request.headers.get('cf-ipcountry').toUpperCase();
const ip_address = request.headers.get('cf-connecting-ip');
const user_agent = request.headers.get('user-agent');
let response = null;
let url = new URL(request.url);
let url_hostname = url.hostname;
if (https == true) {
url.protocol = 'https:';
} else {
url.protocol = 'http:';
}
if (await device_status(user_agent)) {
var upstream_domain = upstream;
} else {
var upstream_domain = upstream_mobile;
}
url.host = upstream_domain;
if (url.pathname == '/') {
url.pathname = upstream_path;
} else {
url.pathname = upstream_path + url.pathname;
}
if (blocked_region.includes(region)) {
response = new Response('Access denied: WorkersProxy is not available in your region yet.', {
status: 403
});
} else if (blocked_ip_address.includes(ip_address)) {
response = new Response('Access denied: Your IP address is blocked by WorkersProxy.', {
status: 403
});
} else {
let method = request.method;
let request_headers = request.headers;
let new_request_headers = new Headers(request_headers);
new_request_headers.set('Host', upstream_domain);
new_request_headers.set('Referer', url.protocol + '//' + upstream_domain);
if(method == 'POST'){
let origin_formData = await request.text()
data = {
method: method,
headers: new_request_headers,
body : origin_formData
}
console.log(data)
}else if(method == 'GET'){
data = {
method: method,
headers: new_request_headers
}
}
let fuckKeys = Object.fromEntries(new_request_headers)
console.log(method)
console.log(fuckKeys)
let original_response = await fetch(url.href, data)
connection_upgrade = new_request_headers.get("Upgrade");
if (connection_upgrade && connection_upgrade.toLowerCase() == "websocket") {
return original_response;
}
let original_response_clone = original_response.clone();
let original_text = null;
let response_headers = original_response.headers;
let new_response_headers = new Headers(response_headers);
let status = original_response.status;
if (disable_cache) {
new_response_headers.set('Cache-Control', 'no-store');
}
new_response_headers.set('access-control-allow-origin', '*');
new_response_headers.set('access-control-allow-credentials', true);
new_response_headers.delete('content-security-policy');
new_response_headers.delete('content-security-policy-report-only');
new_response_headers.delete('clear-site-data');
if (new_response_headers.get("x-pjax-url")) {
new_response_headers.set("x-pjax-url", response_headers.get("x-pjax-url").replace("//" + upstream_domain, "//" + url_hostname));
}
const content_type = new_response_headers.get('content-type');
if (content_type != null && content_type.includes('text/html') && content_type.includes('UTF-8')) {
original_text = await replace_response_text(original_response_clone, upstream_domain, url_hostname);
} else {
original_text = original_response_clone.body
}
response = new Response(original_text, {
status,
headers: new_response_headers
})
}
return response;
}
async function replace_form_data(formData, upstream_domain, host_name) {
let text = await response.text()
var i, j;
for (i in replace_dict) {
j = replace_dict[i]
if (i == '$upstream') {
i = upstream_domain
} else if (i == '$custom_domain') {
i = host_name
}
if (j == '$upstream') {
j = upstream_domain
} else if (j == '$custom_domain') {
j = host_name
}
let re = new RegExp(i, 'g')
text = text.replace(re, j);
}
return text;
}
async function replace_response_text(response, upstream_domain, host_name) {
let text = await response.text()
var i, j;
for (i in replace_dict) {
j = replace_dict[i]
if (i == '$upstream') {
i = upstream_domain
} else if (i == '$custom_domain') {
i = host_name
}
if (j == '$upstream') {
j = upstream_domain
} else if (j == '$custom_domain') {
j = host_name
}
let re = new RegExp(i, 'g')
text = text.replace(re, j);
}
return text;
}
async function device_status(user_agent_info) {
var agents = ["Android", "iPhone", "SymbianOS", "Windows Phone", "iPad", "iPod"];
var flag = true;
for (var v = 0; v < agents.length; v++) {
if (user_agent_info.indexOf(agents[v]) > 0) {
flag = false;
break;
}
}
return flag;
}
三、编辑wp-config.php
bash
define( 'WP_DEBUG', false ); 下面增加
$domain = array("wow.auz.cc", "wowchina.free.fr", );
if(in_array($_SERVER['HTTP_HOST'], $domain))
{
define('WP_SITEURL', 'http://' . $_SERVER['HTTP_HOST']);
define('WP_HOME', 'http://' . $_SERVER['HTTP_HOST']);
}
define( 'WP_CONTENT_URL', '/wp-content');
四、workers自定义域名绑定
Cloudflare小黄云不可用
Xrea空间wordpress绑定多个域名
一、登录Xrea 空间管理后台:https://cp.xrea.com/account/login/
二、域名A记录到K2空间IP,等待生效之后域名设置绑定。这里会强制A记录检查。
三、接着是站点设置:提供免费的SSL,几分钟-十几分钟生效。多个域名绑定一个站点目录。
四、需要修改wp-config.php
define( 'WP_DEBUG', false );
下面添加如下代码(除你在站点设置的主域名外都需要填写进去)
$domain = array("域名A", "域名B", "域名C");
if(in_array($_SERVER['HTTP_HOST'], $domain))
{
define('WP_SITEURL', 'http://' . $_SERVER['HTTP_HOST']);
define('WP_HOME', 'http://' . $_SERVER['HTTP_HOST']);
}
define( 'WP_CONTENT_URL', '/wp-content');
Tips:
编辑PHP配置文件最好用Visual Studio Code。避免格式出错导致wordpress跳500错误。
若出现500错误进不了wp-admin。解决办法:把wp-config.php备份后将网站目录下原文件删掉,重新运行wordpress安装程序,填写原数据库账户密码表前缀会自动生成一份。期间会提示你已经安装wordpress,数据不会丢失。
chez.com空间管理不容易
Twenty Thirteen主题CSS修改
wordpress3.8的主题能看得过去的 好像比较少
Twenty Thirteen 观感还说得过去,要说很好看吧,那倒是没有。
默认主题不修改,输出效果比较尴尬。
搜索修改了style.css
输出效果还能过得去
style 有兴趣的可以去下载修改。
免费构建个人博客Hexo + GitHub + Cloudflare
参考文章:https://linux.do/t/topic/298986
关于书写 Markdown抽空研究下 主题的美化设置还没来得及折腾看下安装效果图
AUZ为Authorization的缩写,“授权,委托”
Argon主题推荐
bash
{"argon_theme_color":"#74787b","argon_theme_color_hex_preview":"#74787b","argon_show_customize_theme_color_picker":true,"argon_enable_immersion_color":"false","argon_darkmode_autoswitch":"false","argon_enable_amoled_dark":"false","argon_card_radius":"4","argon_card_shadow":"default","argon_page_layout":"double","argon_article_list_waterflow":"1","argon_article_list_layout":"1","argon_font":"sans-serif","argon_assets_path":"jsdelivr_fastly","argon_custom_assets_path":"","argon_wp_path":"/","argon_dateformat":"YMD","argon_enable_headroom":"false","argon_toolbar_title":"","argon_toolbar_icon":"https://uinoc.com/wp-content/uploads/2024/12/logo.jpg","argon_toolbar_icon_link":"https://uinoc.com","argon_toolbar_blur":"false","argon_banner_title":"","argon_banner_subtitle":"","argon_banner_size":"fullscreen","argon_page_background_banner_style":"transparent","argon_show_toolbar_mask":true,"argon_banner_background_url":"","argon_banner_background_color_type":"shape-primary","argon_banner_background_hide_shapes":false,"argon_enable_banner_title_typing_effect":"false","argon_banner_typing_effect_interval":"100","argon_page_background_url":"https://www.notion.so/images/page-cover/woodcuts_4.jpg","argon_page_background_dark_url":"","argon_page_background_opacity":"0.9","argon_sidebar_banner_title":"","argon_sidebar_banner_subtitle":"--hitokoto--","argon_sidebar_auther_name":"","argon_sidebar_auther_image":"https://uinoc.com/wp-content/uploads/2024/12/logo.jpg","argon_sidebar_author_description":"求知若饥,虚心若愚 Never be satisfied, and always push yourself. Do (or be willing to keep trying) the things people say cannot be done.","argon_sidebar_announcement":"求知若饥,虚心若愚 Never be satisfied, and always push yourself. Do (or be willing to keep trying) the things people say cannot be done.","argon_fab_show_settings_button":"true","argon_fab_show_darkmode_button":"true","argon_fab_show_gotocomment_button":"true","argon_seo_description":"","argon_seo_keywords":"docker, Linux, notionnext, wordpress","argon_article_meta":"author|time|views|categories","argon_show_readingtime":"true","argon_reading_speed":"300","argon_reading_speed_en":"160","argon_reading_speed_code":"20","argon_show_thumbnail_in_banner_in_content_page":"false","argon_first_image_as_thumbnail_by_default":"false","argon_reference_list_title":"参考","argon_show_sharebtn":"domestic","argon_show_headindex_number":"true","argon_donate_qrcode_url":"","argon_additional_content_after_post":"","argon_related_post":"tag","argon_related_post_sort_orderby":"rand","argon_related_post_sort_order":"DESC","argon_related_post_limit":"5","argon_article_header_style":"article-header-style-default","argon_outdated_info_time_type":"modifiedtime","argon_outdated_info_days":"1095","argon_outdated_info_tip_type":"inpost","argon_outdated_info_tip_content":"本文最后更新于 %date_delta% 天前,其中的信息可能已经有所发展或是发生改变。","argon_archives_timeline_show_month":"true","argon_archives_timeline_url":"https://uinoc.com/history","argon_footer_html":"
Copyright ©2022 版权所有 观语
","argon_enable_code_highlight":"true","argon_code_theme":"agate","argon_code_highlight_hide_linenumber":"false","argon_code_highlight_break_line":"true","argon_code_highlight_transparent_linenumber":"false","argon_math_render":"none","argon_mathjax_cdn_url":"//cdn.jsdelivr.net/npm/mathjax@3/es5/tex-chtml-full.js","argon_mathjax_v2_cdn_url":"//cdn.jsdelivr.net/npm/mathjax@2.7.5/MathJax.js?config=TeX-AMS_HTML","argon_katex_cdn_url":"//cdn.jsdelivr.net/npm/katex@0.11.1/dist/","argon_enable_lazyload":"true","argon_lazyload_threshold":"800","argon_lazyload_effect":"fadeIn","argon_lazyload_loading_style":"1","argon_enable_fancybox":"true","argon_enable_zoomify":"false","argon_zoomify_duration":"200","argon_zoomify_easing":"cubic-bezier(0.4,0,0,1)","argon_zoomify_scale":"0.9","argon_enable_pangu":"false","argon_custom_html_head":"","argon_custom_html_foot":"","argon_enable_smoothscroll_type":"1","argon_enable_into_article_animation":"false","argon_disable_pjax_animation":"false","argon_comment_pagination_type":"feed","argon_comment_emotion_keyboard":"true","argon_hide_name_email_site_input":"false","argon_comment_need_captcha":"true","argon_get_captcha_by_ajax":"false","argon_comment_allow_markdown":"true","argon_comment_allow_editing":"true","argon_comment_allow_privatemode":"false","argon_comment_allow_mailnotice":"true","argon_comment_mailnotice_checkbox_checked":true,"argon_comment_enable_qq_avatar":"true","argon_comment_avatar_vcenter":"false","argon_who_can_visit_comment_edit_history":"admin","argon_enable_comment_pinning":"true","argon_enable_comment_upvote":"true","argon_comment_ua":"platform,browser","argon_show_comment_parent_info":"true","argon_fold_long_comments":"false","argon_gravatar_cdn":"","argon_text_gravatar":"false","argon_enable_search_filters":"true","argon_search_filters_type":"post,page,shuoshuo","argon_pjax_disabled":"false","argon_hide_categories":"","argon_enable_login_css":"true","argon_home_show_shuoshuo":"false","argon_fold_long_shuoshuo":"false","argon_enable_timezone_fix":"false","argon_hide_shortcode_in_preview":"false","argon_trim_words_count":"175","argon_enable_mobile_scale":"true","argon_disable_googlefont":"false","argon_disable_codeblock_style":"false","argon_update_source":"stop","argon_hide_footer_author":"true"}
在Serv00上搭建halo博客
参考文章:https://blog.xjfkkk.top/post/halo
在Serv00上搭建Halo博客的步骤包括:开放端口、将域名托管到Serv00、删除public_html中的文件、创建MySQL数据库、安装Halo、创建配置文件、编写启动和重启脚本、赋予脚本权限,并设置定时任务以自动重启服务。
1.开放一个端口并开启应用权限
2.将域名托管到serv00并创建Website
域名托管不在这里叙述,可以看这部分,也可以使用CF进行托管
创建Website
3.进入文件管理后台删除public_html中的文件
4.创建mysql数据库
记住你创建的数据库,等会需要用
5.安装halo
进入你的域名目录并创建halo文件
cd /usr/home/你的serv名字/domains/域名/public_html && mkdir halo
进入halo目录并下载halo
cd halo && wget https://dl.halo.run/release/halo-2.20.9.jar -O halo.jar
5.创建.halo文件并创建application.yaml文本
进入文件管理器后台,在Jar包同级目录创建.halo
文件,并在其中创建application.yaml
文本,将下面代码放入其中
server:
port: PORT
# Response data gzip.
compression:
enabled: false
spring:
#sql:
# init.platform: mysql
r2dbc:
url: r2dbc:pool:mysql://数据库地址:3306/数据库名
username: 数据库用户名
password: 数据库密码
halo:
# Your admin client path is https://your-domain/{admin-path}
admin-path: admin
# memory or level
cache: level
将PORT
替换为你放行的端口 将数据库地址:3306/数据库名
,数据库用户名
和数据库密码
替换为你创建的
6. 在Jar包同级目录新建文件run.sh文本
bash
#!/bin/bash
export HALO_WORK_DIR="/usr/home/serv00账号名/domains/域名/public_html/halo/.halo"
export HALO_EXTERNAL_URL="https://xxxxx.com"
java17 -server -Xms128m -Xmx256m -jar -Duser.timezone=Asia/Shanghai /usr/home/serv00账号名/domains/域名/public_html/halo/halo.jar --spring.config.additional-location=/usr/home/serv00账号名/domains/域名/public_html/halo/.halo/application.yaml
将serv00账号名
,域名
,https://xxxxx.com
替换为自己的
7.创建restart.sh文本
在jar包同级目录创建restart.sh
#!/bin/bash
# 设置脚本路径
SCRIPT_PATH="/usr/home/serv00账号名/domains/域名/public_html/run.sh"
WORK_DIR="/usr/home/serv00账号名/domains/域名/public_html"
![image|690x340](upload://nAVB314l5Ad8qhlxoZLdXky6iSA.png)
# 检查脚本是否在运行
if ! pgrep -f "$SCRIPT_PATH" > /dev/null
then
# 如果脚本没有运行,则重新启动它
cd "$WORK_DIR"
nohup ./run.sh > /dev/null 2>&1 &
echo "Restarted run.sh at $(date)" >> "$WORK_DIR/restart_log.txt"
fi
8. 赋权你创建的文本
赋权run.sh
chmod +x /usr/home/serv00用户名/domains/域名/public_html/halo/run.sh
赋权restart.sh
chmod +x /usr/home/serv00用户名/domains/域名/public_html/halo/restart.sh
9.在CF上保活
后记:尝鲜可以,内存已经超限了。